Tuesday, February 1, 2011

Waterfall and Pond – Planning for Believability

In my research of water gardens and waterfalls, I picked up quite a few helpful tidbits of information. One piece of information which rang in my head constantly is that a poorly designed waterfall is horribly unattractive and completely unbelievable. In light of this, I was going to go with a geometric, contemporary design which would match the house nicely. Unfortunately, my wife was strongly opposed to this idea so I am going with a natural looking design. Natural looking would be a lot easier if there was some kind of elevation to work with, but here in the Scottsdale suburbs circa 1979, there is nothing but flat ground and stucco walls. Somehow, I need to take a 12 foot by 8 foot piece of flat ground and introduce a believable flow of water.

No one is going to ever think that this waterfall exists naturally, but at least I am hoping that turns out to be believable or at least nice looking.

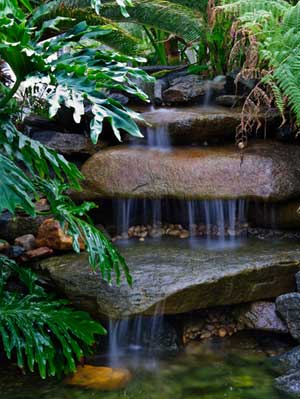
It’s very easy to build an unbelievable waterfall – most of the constructed waterfalls I’ve seen are terrible, Even some “professionally built” waterfalls tend to leave me wondering if the builders have ever seen a natural waterfall (and how much the client paid for that monstrosity). Consider this pile of rocks in the image to the left - it's a great example of everything NOT to do.

There are, fortunately, great waterscape builders out there to mimic, and a few are very enthusiastic to share their knowledge. One of the best examples is The Pond Digger in Southern California who has a number of YouTube videos taking about the details of pond and waterfall construction. I have watched each of his videos several times – a great resource.

Even though I have meditated on building my waterfall for over half a year – and I could continue for another two years just thinking about it – I am going to move forward with the acknowledgement that I have to be very conscious of believability.


Sunday, January 30, 2011

Waterfall and Pond - The beginning

It’s time for another project. This time, it’s a fish pond and waterfall. Before starting to dig, I did a lot of research on fish ponds, koi ponds, pond filters and waterfalls. There is a lot of good advice and direction out on the internet so I was able to get a pretty solid plan in place.

Since this is a pretty big deal, it’s important that I plan it out correctly before beginning. Of course, there are going to be changes to the plan along the way, but with some proper planning, I can reduce how many changes occur and how drastic those changes are. The first part of planning is to answer my favorite question; Why build a pond and waterfall?

When I purchased the house, the pool pump and filter were nicely concealed behind a tree, a railroad tie wall and a rats nest of vine (I think it’s called bear claw). The tree had to go because it did nothing for me and cost about $50 a year to maintain. The railroad tie wall had to go because it was ugly. And the vines had to go because the root structure is invasive and the vines will kill anything in it’s path. Having ripped all that out, I then moved the sand filter and PVC piping to a more consolidated position. Now, with a lot more space in that corner of my lot, I have a very unsightly view of the pool equipment.

This part of my yard is a focal point, not only from the patio and the yard, but also from the kitchen. The pump is even visible through a window when approaching the front door. Needless to say, pool equipment is not really the sight I want from these vantage points. So I want a waterfall to conceal the unsightly pool equipment.


Tuesday, July 6, 2010

Plywood and veneer

I am in the midst of building my built-in shelves and desk. When I was in the design phase, I thought about a number of different materials. The look I was/am going for is old-school, dark stained, floor to ceiling library. Building it out of pine, while certainly the cheapest, would look either too cheap or too country to get the look I am trying to achieve. I don't have the shop to do a hardwood desktop so that was also out of the question. My next consideration was veneer.
There are lots of good veneers out there. Some of the most exotic woods and beautiful grains are available in a wide scale of prices. Looking for the lowest price but most appropriate wood type, I decided on an acceptable veneer. Then I added up how much material I would need. Price multiplied by sq. ft and I very quickly started looking for another option. The total price for veneer, for this particular project - a lot of surfaces involved - ended up being around $2000. That is both literally and figuratively on top of the base materials needed to build the structure of the desk.
My final choice was to go with a formaldehyde-free birch finish plywood. 5 sheets of 3/4" and one sheet of 1/2" was exactly enough to do the job (I hope... I'm pretty sure... I'll know soon). Total price was around $260. Much better. Yet one concern did, and still does, exist.
The idea of building something nice out of plywood, to me, is a bit of an oxymoron. Something about plywood - stained, painted or otherwise - always reminds me of that stereo cabinet I build in high school shop class. In a week or two, when I step back and look at the finished product, will I realize that my new cubicle resembles the inside of a plywood box? I hope not.
One thing that has helped me continue on, though. I was perfectly happy with veneer. Albeit, I was going to go for something cool, but birch isn't a bad wood. In fact, birch is pretty easy to finish in a way that looks quite handsome. So why then, do I have this prejudice against plywood. After all, plywood is nothing more than a series of veneers. I repeat this to myself as I cut or stain or edge band or poly. It's helping me move along.
In the back of my head I think 'I can just apply a veneer later, if I can't stand it'.

Wednesday, June 30, 2010

Honey Make Money

With the decision to hire out the job of building my office came a great relief. No longer would I be stressing out over when and how I would tackle each task. No longer would I be scouring the internet to figure out how I would accomplish something. No longer would I care about how much concrete to buy.
On the other hand, a new set of responsibilities fell on my shoulders. While Sammy, my hired hand, would take care of all methods and materials, I now have two responsibilities; 1) make money and 2) manage the project.
Flipping through the channels the other night, I heard a woman on HGTV say 'You can't build a house with monopoly money'. It true. You need real money and it goes very fast. When it's not me at big box doing the purchasing, there is a lot less time wasted because Sammy doesn't really care if he saves a dollar or two; he just cares if he has the materials he needs. When you are trying to complete a project, that's a healthier way to go.
In slight contrast, I can't just let Sammy loose on the thing and expect it to come out the way I want it. I have to stay vigilant to ensure that boxes are put in the right place, supports are at the appropriate height, and every other little detail is made.
So for the past few weeks, my 'job' has been pretty different. It has no longer been hours in Home Depot; rather it's a quick stop, pick up a $100 gift card or two and I'm done. It has no longer been early mornings quietly sizing boards or measuring width; it has been staying ahead of the carpenter to make sure shelves will have something to hang on.
Sammy finished his work about a week ago. Now I have a pretty much completed room except for shelves, desk and low-voltage jacks (phone, network, cable). Although it was nice to have the job accelerated back to a better timeline,it was amazing how quickly things slowed down once the project was back in my hands.
Maybe another week or two and it will be all done.

Monday, June 7, 2010

When to say enough

After spending a couple weeks traveling on business, I was ready to return home and "bang out" the office. Really, it's a pretty simple job. Demo one wall, pour a 3 1/2 overpour in a 3'x9' space, frame out about 9 linear feet, pop in two windows and a door, insulate & seal. It's not that much work and none if it is very tricky. Except for a couple things...
It's early June now in Arizona. That means that by 9 am, it's about 100 degrees. That's pretty hot. When you are staring at the idea of hand-mixing about 12 bags of ready-mix, "pretty hot" turns quickly to "oh no, much too hot". Add to the heat, this slow realization that I am not really in my early 20's anymore. And, to top it off, the clock is ticking; I have too many other things lined up.
I stood in the open space - soon to become my office - and contemplated the important things in my life. Being able to proudly say "I built this", is pretty low on that list. So, I will dip into the coffers and pay someone to do it for me. The things that are very critical (electric and HVAC) were planned to be hired help, and the areas where I have no skills (stucco) as well. However, after deep consideration, the rest of the work too will be outsourced.
Wow, what am I going to do with all this time?

Monday, May 17, 2010

The Pool Pump - Lessons Learned

Well, things didn't go a smoothly as I hoped. They didn't go as badly as I feared, either. First lesson learned - don't try to move a sand filter when it is full of sand. I did this and the first two or three inches went very well, then it slipped off the slab and I broke the plastic base that supports the filter. So, I ran off to Big Orange and got a wet-dry vac to suck the sand out. Then I noticed I put major crack in the plastic base support. That doesn't look good. Once again, I'm in the car visiting pool supply places - long story short; this little plastic base is a $110 special order item. Ha! No thanks. A couple of hose clamps fitted together will do a fine job fixing my error. After that, it was a matter of blasting the earth with a pressure washer, sucking up the water with the new wet vac (much easier than a coffee can) and blasting a little more with the pressure washer. Now, some people might think a shovel is a good way of digging a hole. In some cases, shovels do work fine. But digging in the Arizona ground is very similar to digging solid rock. The soil here is a heavy clay. A friend had told me that saturating the ground with water helps ease the task, I just took his suggestion a little further. What a fantastic approach. Putting the pine cone attachment on the pressure washer allows me to quickly and easily cut the earth with great precision. A great way to do it (and cheaper than renting a jack hammer.) Another issue with doing work like this in Arizona is the heat. It's hard to stay interested in a project like this, so Sunday afternoon I decided I would take a rest and resume the project the next weekend. Hopefully, after a week of sitting fallow, the pool would not be too green. Friday afternoon, I resumed my job, glued all the PVC into place, refilled the filter (with the old sand) and fired it up. Backwash works well. Turn off the pump. Switch off the backwash. Turn on the pump. Pressure builds. Then a quiet little woosh and there is sand everywhere. Hmmm. Seems there is a bit of a problem. Next morning, Saturday, I empty out the filter turn it over and it seems I have discovered part two of why sand filters shouldn't be moved full. Yep, I've cracked the darn thing. I wait until the stores open and once again, I'm in the car off to buy a new one. A Triton II TR60 costs about $600. However, Checker Pool & Pump Supply on Indian Bend is having a sale. It's going to run me $427. Ok, fine. I don't have much of a choice. I buy a new filter and six bags of new sand. The mini cooper handles 300lbs of sand pretty well. I install the filter, and fire it up. This time it's working well. Sunday morning now. The new config has been running 20 hours and all is well. And I'm very happy this phase of the project is complete. The results are quite nice.

Friday, May 14, 2010

The Pool Pump - Moving things around

One of my first initiatives, now that I've stripped the back part of the yard, is to relocate my sand filter and the piping related to that. I've been digging things up for about a month now, and tomorrow I will attempt the herculean task of moving this thing.

Ok - I know everyone reading this (which is no one) is thinking "Really? you're going to move a sand filter? Do you know how much they weigh?"

Yes, the sand filter weights about 350lbs. And yes, I really am going to move it...full of sand. The reason for this is to gain a 2' x 7' section of yard so I can have a little more space for a fountain and water garden. I'm only moving the thing about 2' in a diagonal direction - moving it to a slab I poured where the level and tape are in the photo. I expect it to be quite difficult.

I guess the upside of that is it wont be half as hard to move it as it will be to take it out someday! (Yes, I've considered that too and decided that since it is only 40lbs empty, when that eventuality comes, it will simply have to be emptied first before removing it.


Here is a list of challenges:
  1. I am still waiting to acquire one last 1 1/2" PVC ball valve.
  2. I am expecting this thing to be very heavy
  3. Once I cut the pipes, how much water is going to come out of them
  4. How can I minimize #3 above
  5. Will there be enough room between the filter and the pump to put in proper housing
  6. Since I am using a pressure washer to dig up the dense earth, will I have enough yard space to bail things out
  7. Am I putting too many bends in the system?
  8. Will I be able to break the slab just enough to run the pipes but not so much that it undermines the area where the pump sits
  9. Can I get a little more of the digging done this afternoon?
  10. Will I have any leaks
  11. Have I thought enough about how all those pipes are going to run?
  12. Is it going to be really hot tomorrow?
I'll let you know how it goes.